The code for the front-end can be found on GitHub here and the back-end for the raspberry pi, here can be found here
Using the ruby noise detection library, that was edited from @mmornati’s original code, my goal was to be able to capture noise from a barking dog and turn that noise into readable data.
The reason why it is called The Dog "Caller" is because the goal of this gadget is to help train our pups into being better while we are away. Using the Dog Caller we are able to track the behavior and, in turn, find out the triggers that cause the unwanted behavior. This device could even be hooked up to an intervention mechanism like a dog whistle or noise maker so that training doesn’t have to stop when you are away.
Components
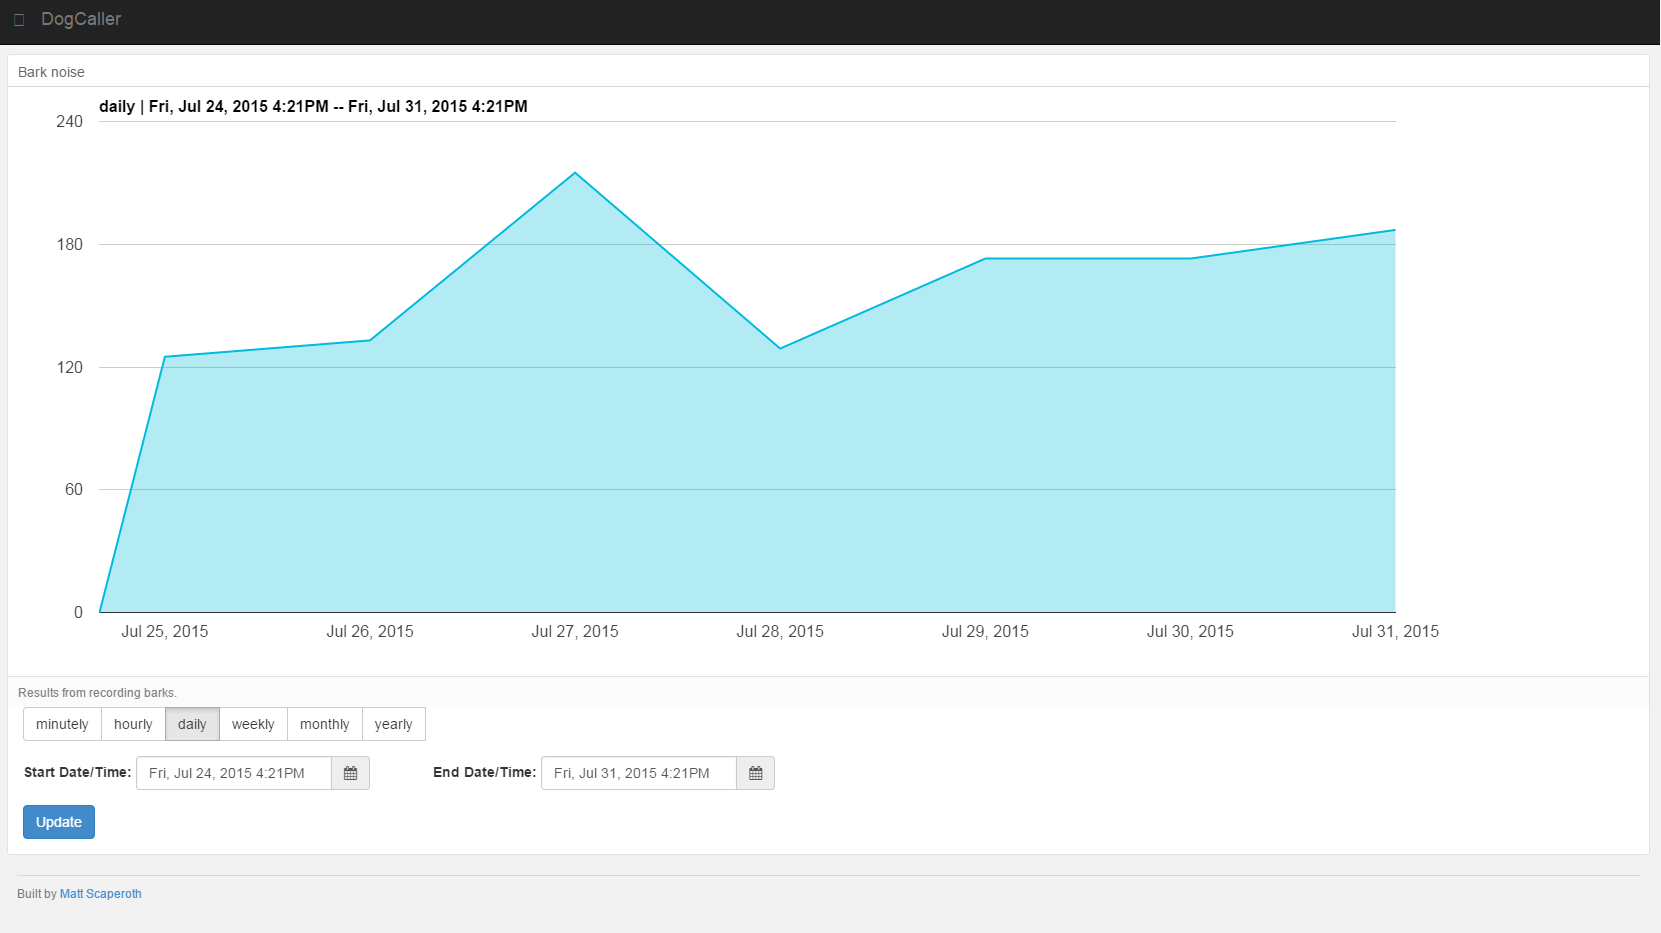
Using a Raspberry Pi, I read the signal from an attached microphone and, if the bark is loud enough (above some arbitrary threshold), send the value, which is essentially the noise level, of the bark to a Keen.io account. The created Ruby application then displays real-time data into an easy-to-use graphic that shows how many times the dog had broken the particular threshold.
Getting Started
Keen IO Setup
Add to your Gemfile:
gem 'keen'or install from Rubygems:
gem install keenkeen is tested with Ruby 1.8 and 1.9 on:
- MRI
- Rubinius
- jRuby (except for asynchronous methods - no TLS support for EM on jRuby)
Noise Detection Setup
The noise dector ruby script uses two linux tool to record and analyse de output: sox and arecord. So you need to install these packages on your raspberrypi (or other linux system):
sudo apt-get install sox alsa-utils libssl-dev
gem install em-http-request
Then, in the current version, the script does not accept parameters to change file location (log, tmp recording and pid file), so you need to allow the script execution user (pi for example) the write access to these files and folders:
RECORD_FILENAME='/tmp/noise.wav'
LOG_FILE='/var/log/noise_detector.log'
PID_FILE='/etc/noised/noised.pid'
or you can edit the script changin these variables values with what you prefer for your system.
KEEN IO Ruby Configuration
Before making any API calls, you must supply keen-gem with a Project ID and one or more authentication keys. (If you need a Keen IO account, sign up here - it’s free.)
Setting a write key is required for publishing events. Setting a read key is required for running queries. Setting a master key is required for performing deletes. You can find keys for all of your projects on keen.io.
The recommended way to set keys is via the environment. The keys you can set are
KEEN_PROJECT_ID, KEEN_WRITE_KEY, KEEN_READ_KEY and KEEN_MASTER_KEY.
You only need to specify the keys that correspond to the API calls you’ll be performing.
If you’re using foreman, add this to your .env file:
KEEN_PROJECT_ID=aaaaaaaaaaaaaaa
KEEN_MASTER_KEY=xxxxxxxxxxxxxxx
KEEN_WRITE_KEY=yyyyyyyyyyyyyyy
KEEN_READ_KEY=zzzzzzzzzzzzzzz
If not, make a script to export the variables into your shell or put it before the command you use to start your server.
When you deploy, make sure your production environment variables are set. For example, set config vars on Heroku. (We recommend this environment-based approach because it keeps sensitive information out of the codebase. If you can’t do this, see the alternatives below.)
Once your environment is properly configured, the Keen object is ready to go immediately.
Detect Audio Card
pi@raspberrypi ~ $ noise_detection.rb -d
Detecting your soundcard...
0 [ALSA           ]: BRCM bcm2835 ALSbcm2835 ALSA - bcm2835 ALSA
                     bcm2835 ALSA
1 [U0x46d0x8d7    ]: USB-Audio - USB Device 0x46d:0x8d7
                     USB Device 0x46d:0x8d7 at usb-bcm2708_usb-1.2, full speed
Test Audio Card Record
pi@raspberrypi ~ $ noise_detection.rb -t 1
Testing soundcard...
Samples read:             40000
Length (seconds):      5.000000
Scaled by:         2147483647.0
Maximum amplitude:     0.013245
Minimum amplitude:    -0.041565
Midline amplitude:    -0.014160
Mean    norm:          0.013523
Mean    amplitude:    -0.013466
RMS     amplitude:     0.014662
Maximum delta:         0.023560
Minimum delta:         0.000000
Mean    delta:         0.003664
RMS     delta:         0.004679
Rough   frequency:          406
Volume adjustment:       24.059
Starting Noise Detection with Alert
noise_detection.rb -m 1 -n 0.30 -e me@server.com -vThe script will be started in background
Terminating Noise Detection
noise_detection.rb -k
Comments